Getting code onto the MidiMonster or Benito device.
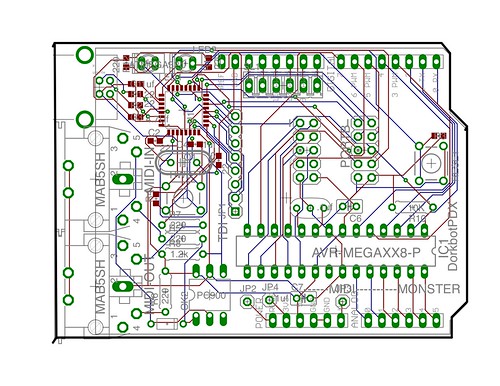
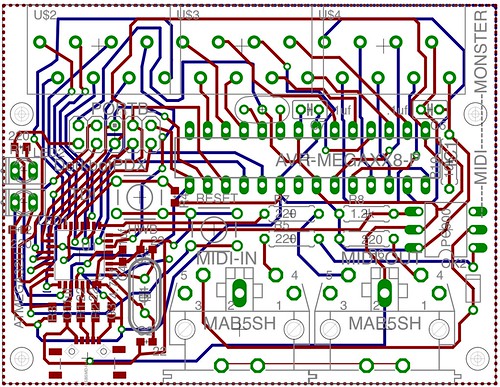
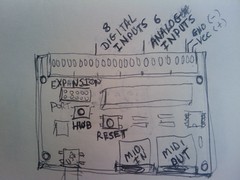 Midi Monster Button Locations. |
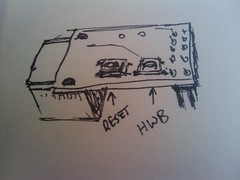 Benito 7g Switch Positions. |
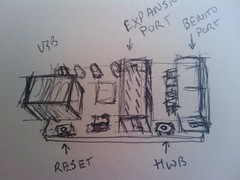 Benito 2010 Switch Locations |
 Benito Without Buttons. |
All of the code on the Benito and MidiMonster devices is open source and references an open source library called the Lightweight Usb For Avr (lufa). Getting the code compiled and onto the device requires a few other open source tools.
AVR-GCC
The most current and stable release of the toochain for the AVR has untill recently been maintained by Eric Wedddington and released as WinAvr (http://sourceforge.net/projects/winavr/) Winaver integrates nicely into atmels avr studio http://www.atmel.com/dyn/Products/tools_card.asp?tool_id=2725 and I reccomend that you get both if you are running windows. Each Winavr Release is closely followed by objective developments CrossPack for avr http://www.obdev.at/products/crosspack/index.html and a script for building the current toolchain on linux which is hosted by AvrFreaks at present there is also a debian package that was put out last month http://www.avrfreaks.net/index.php?name=PNphpBB2&file=viewtopic&t=90172
HWB? DFU?
Most Atmel “atmega” devices have a pin dedicated to determining weather or not the device goes into the bootloader depending on the devices flag settings. This pin is labled HWB (for hardware boot) on most of the datasheets. The usb avr family has this mode set up by default. When you hold the hwb pin low and reset the device it goes into the bootloader. On these devices the built in bootloader uses a usb device class called the Device Firmware Uploader (DFU). Atmel provides a tool called flip for programming DFU devices on windows and linux. There is an open source programmer called dfu-programmer http://dfu-programmer.sourceforge.net/
That other guys stuff.
Those of you who have worked with the teensy boards from paul stoffregon will notice some subtle differences. Paul wrote his own (closed source) bootloader rather than use the bootloader tha comes installed on the chips. Then he uses a hardware trick similar to the auto reset hack to make a single button manipulate both the reset and the hwb pins to put his boards into the bootloader. I didnt feel that either the two button arrangement or the builtin bootloaders were broken so I like most people working with these chips dont fix them.
Using the dfu-programmer
All of the programs in Dean Cameras Lightweight Usb for Avr have a “dfu” target. Once you have the target into the DFU mode you can simply
$make dfu
This will cause the dfu-programmer to erase the flash reprogramm it with a new hex file and restart the chip. You can also do this manually with the following commands
$dfu-programmer atmega32u2 erase
$dfu-programmer atmega32u2 flash mycode.hex
$dfu-programmer atmega32u2 start
This will cause the dfu-programmer to erase the flash reprogramm it with a new hex file and restart the chip.